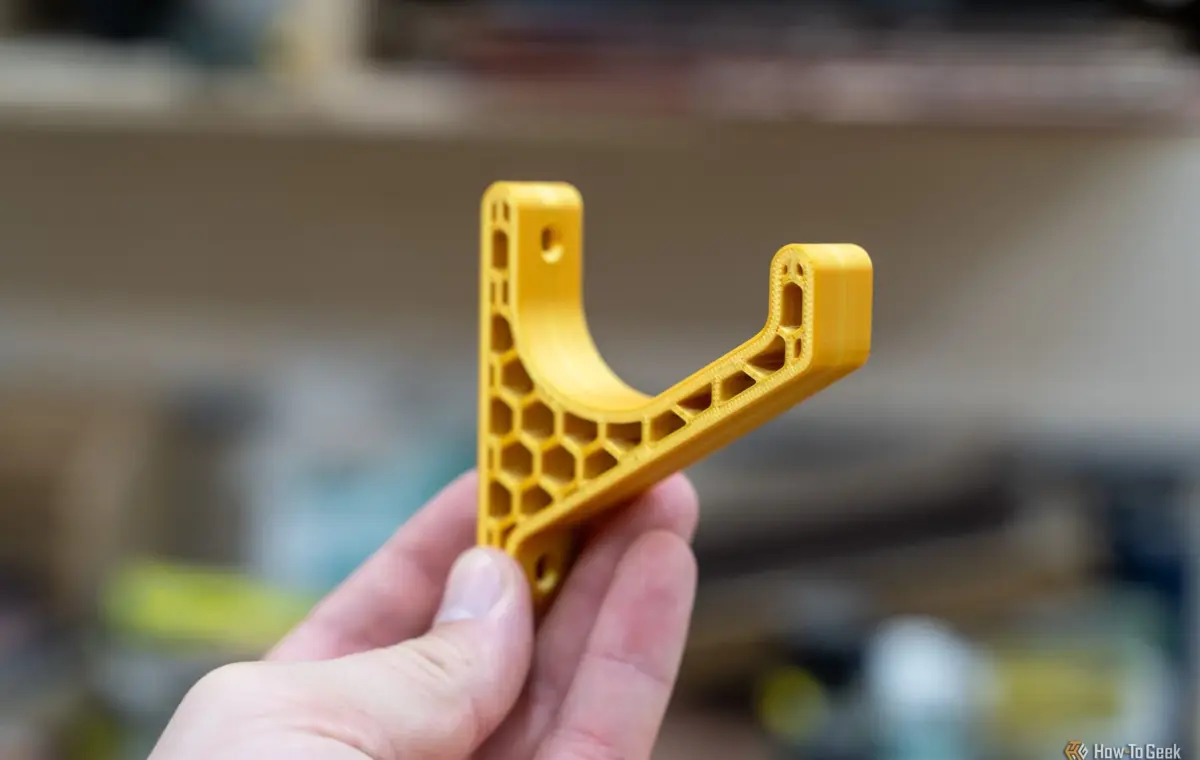
When you slice a 3D model to print, you have to make a decision about what the inside of that model will look like. Unless the designer created a custom internal structure, any open volume inside the model will be filled somehow.
Most of the time, you'll want to use a type of "infill" that saves on material while still offering the right degree of strength. You can find plenty of arguments online about which patterns are best for what job, but most of the time no one will advise using 100% or "solid" infill because it's unnecessary and wasteful. However, the option exists for a reason, and these are a few of the times when you'll want to move that infill density slider all the way to the right.
This issue is simple enough to understand. When you're printing objects that are very small, like gears, spacers, clips, pins, brackets, and the like, they have so little internal volume that the algorithm for generating infill has nothing to work with. It will still attempt it, but the results can be strange, and even result in part that will break too easily or fail.
Your slicer might automatically mitigate this, but with solid infill, it's just a straightforward print, and since these parts are so small anyway, you wouldn't have saved much in materials anyway.
There are cases where you'll want to modify a 3D-printed part after making it, and if that involved drilling holes in it, tapping threads, or trimming parts to get a perfect fit, then hollow infill can be an issue. Screws need solid internal material to grip. Trimming the end of a model and exposing the infill might not look right, or cause issues with strength and durability as one wall is weakened. By using solid infill, you're putting more material inside the print to work with.
You can, of course, change your model so that it already has screw thread or holes in the right places. You also don't have to use solid infill across the entire model.
Since you might only want solid infill specifically around screw holes, press-fit parts, fasteners, or any bit of the model that's likely to experience high loads, you may feel like you're stuck between all-solid models or sparse infill, but that's not true!
In programs like Orca Slicer, you can use "modifier meshes" to alter the print settings for specific parts of the print. So, you might have 90% of your print use regular square or honeycomb infill, but then have specific parts that need it using solid infill. The infill pattern isn't the only thing you can change. You can alter all sorts of settings that influence print quality and strength. That lets you strike a good balance between material saving, weight, and model strength.
One of the reasons to use sparse infill is to make the models lighter, but sometimes you want your model to weigh more. The reasons for this can vary, but tall bases and stands benefit from having a lower center of gravity. You can use the aforementioned modifier meshes to make only some parts solid to transfer the weight where you need it, but this is the simplest way to make a model heavier.
That said, most filaments aren't particularly dense anyway, compared to materials like metals. So if you really need weight, the more complex method is to leave cavities inside the model, stop the print, and then place your metal weights before letting the printer complete the job, sealing the weights in. You can also do this with magnets, which opens up all sorts of other cool possibilities.
My colleague Joe Fedewa has even used Plaster of Paris to add weight to 3D models, by pouring it into cavities. You can see here how he created a design specifically for this, and since the plaster sets so quickly, it's not even necessary to encapsulate it in the model.
One of the main selling points of 3D printing is rapid prototyping, and sometimes in that process you'll be physically modifying a part to make it fit or alter its purpose. In that case, you'll want it to be solid, so that you can cut and send it as you need to. Then, you can measure the dimensions of the modified part and alter your model file to match.
Another use case is if you're printing cosplay parts that are going to fit for someone, sanded, cut, shaped, and painted. In that case, you probably also want things like armor pieces or masks to be printed with solid infill. Experienced cosplayers may instead use tools to leave the deep interior of the piece with sparse infill, and then beef up the outer wall thickness to withstand sanding and heavier modification, but each project has different needs.